This post is a step-by-step on how to install event tracking for a form submit button using the analytics.js code base for Google Analytics. The example is based on a LinkedIn ad campaign for our PPC budget calculator tool, but this can really be used for any type of campaign.
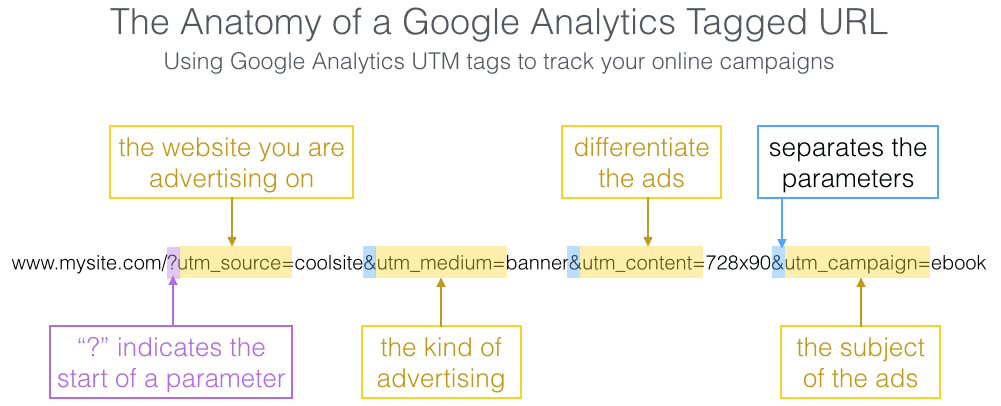
The first step to any SEM campaign tracking is to make sure the URL you are linking back to your site with has the proper tracking parameters for Google Analytics to interpret. I’ve written a detailed post on how advertisers should track online ads that will give you more insights.
But, I needed more. Tracking the visitor back to our site so I could effectively track the source was only half of what I wanted to know. I also wanted to know if they actually used the tool, which for us is when a user clicks on the “Run It” button on the calculator start page.
Normally, I would create a goal for a particular page view that a user would reach if they had effectively run our calculator – except, that’s not how it works! When you run the PPC calculator tool, the entire tool runs in javascript on the page, and thus the URL never changes.
This is where event tracking comes into play.
What I need to do is install a trackable event in the code where the button, or form submission is on the page:
![]()
Here is the step-by-step of what I did:
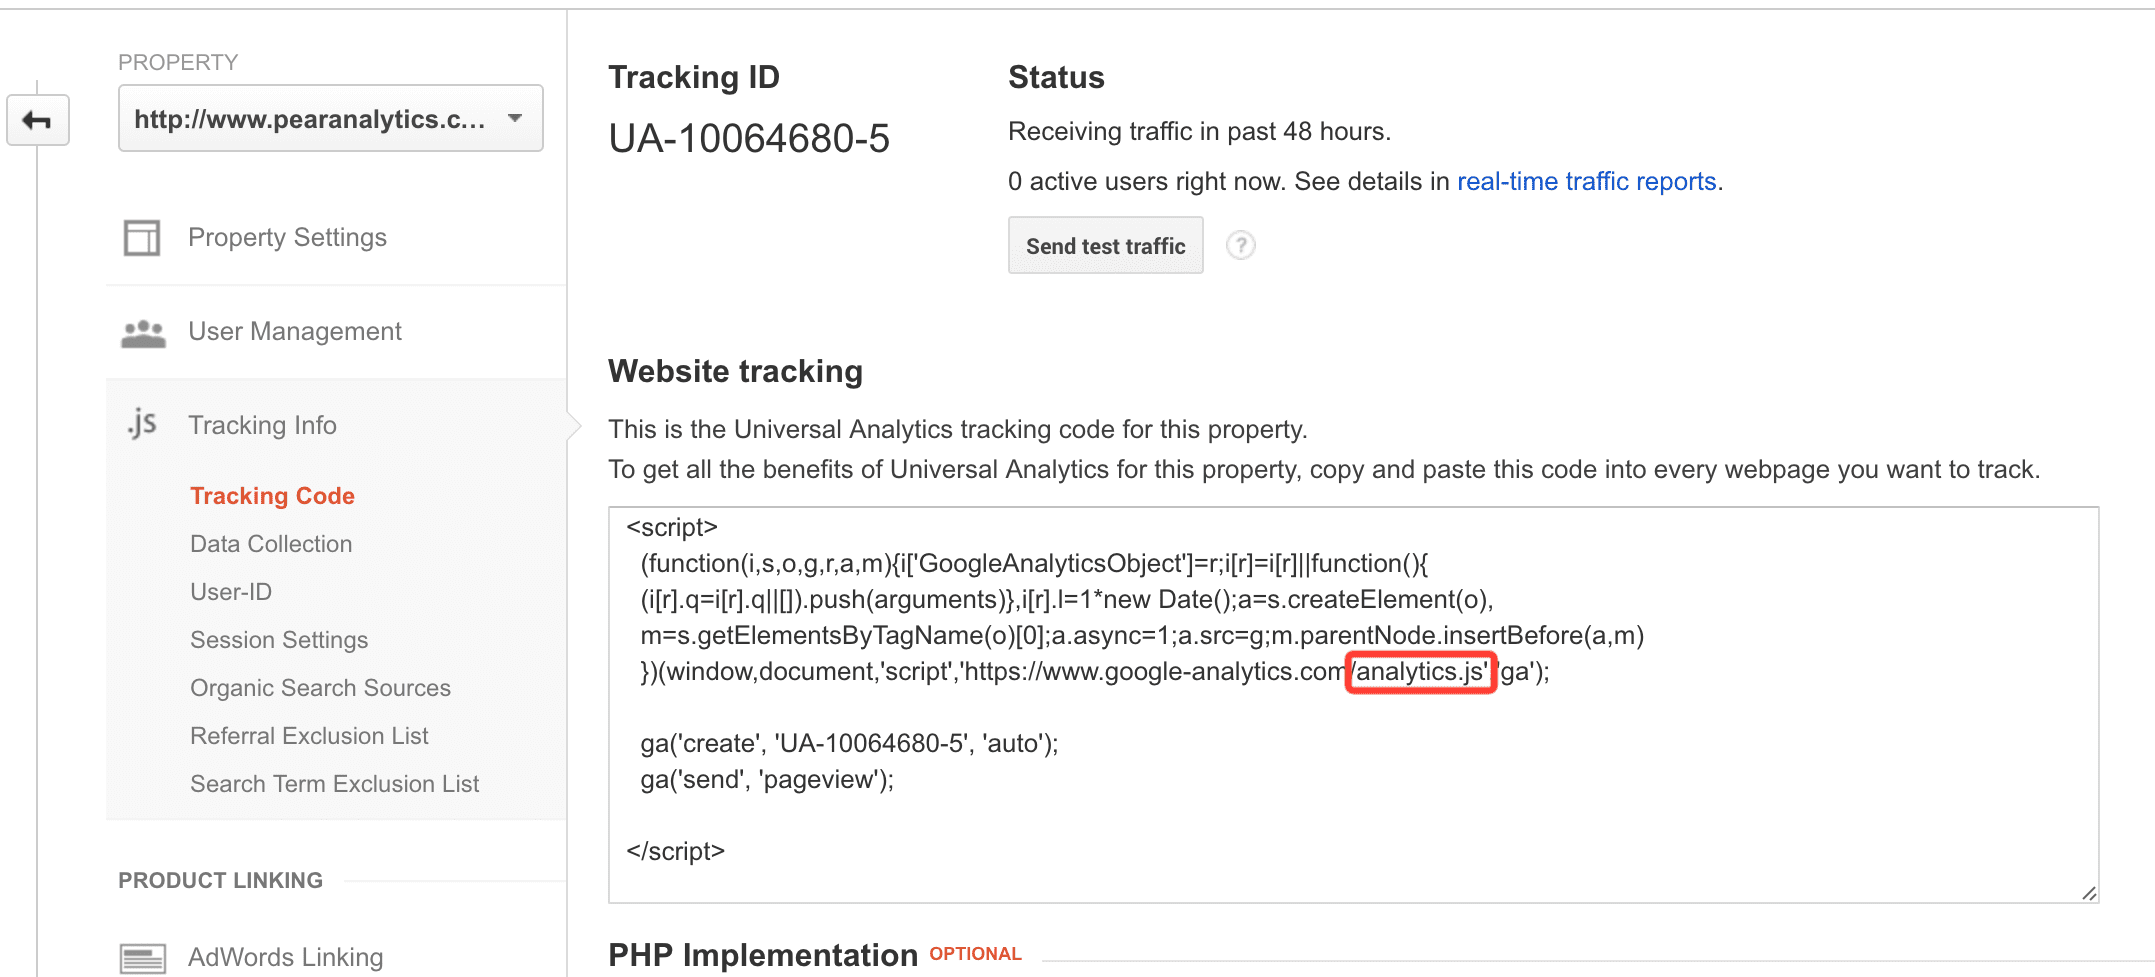
Step 1: Identify the type of Google Analytics code you have. Login to GA, and go to Admin > Property > Tracking Info > Tracking Code. I already knew we were on the latest analytics.js version and not the ga.js version, but you should check to make sure. In the code snippet you will see either analytics.js or ga.js
Step 2: Determine what the correct syntax is for the event. Google Analytics provides pretty good documentation for event tracking implementation that you can reference for either version of the code. I knew that my correct syntax for the event was going to be:
ga('send', 'event', [eventCategory], [eventAction], [eventLabel], [eventValue], [fieldsObject]);
You will notice that the only two objects required are eventCategory and eventAction. I always include eventLabel, but seldom use eventValue.
Step 3: Identify where to place the event tracking code on your page. Our site is in WordPress, but I needed to access the .php file in SFTP mode to do this. I use a program called Coda to access the files on the server, but there are many others that would work just as well. Here is the code for the PPC calculator page, and on here I can see where the “Run It” button is as part of a form object:
![]()
I wasn’t sure if I should place the code directly after the input object (which has the button), or as part of the larger form object. After a couple of unsuccessful tries on the input object, and some research on StackOverflow, I determined that the form object was the correct place to put the code. Here is the code placed following the same syntax as above:
![]()
Step 4: Test your event by using Google Analytics real time data. I know there are other ways to debug this using Inspector on the browser, but to me it’s easier to just jump over to GA and watch the real time event pass. As you can see below, I was able to successfully trigger the event and pass the data into Google Analytics. You can see “button” and “clicked” as the category and action:
![]()
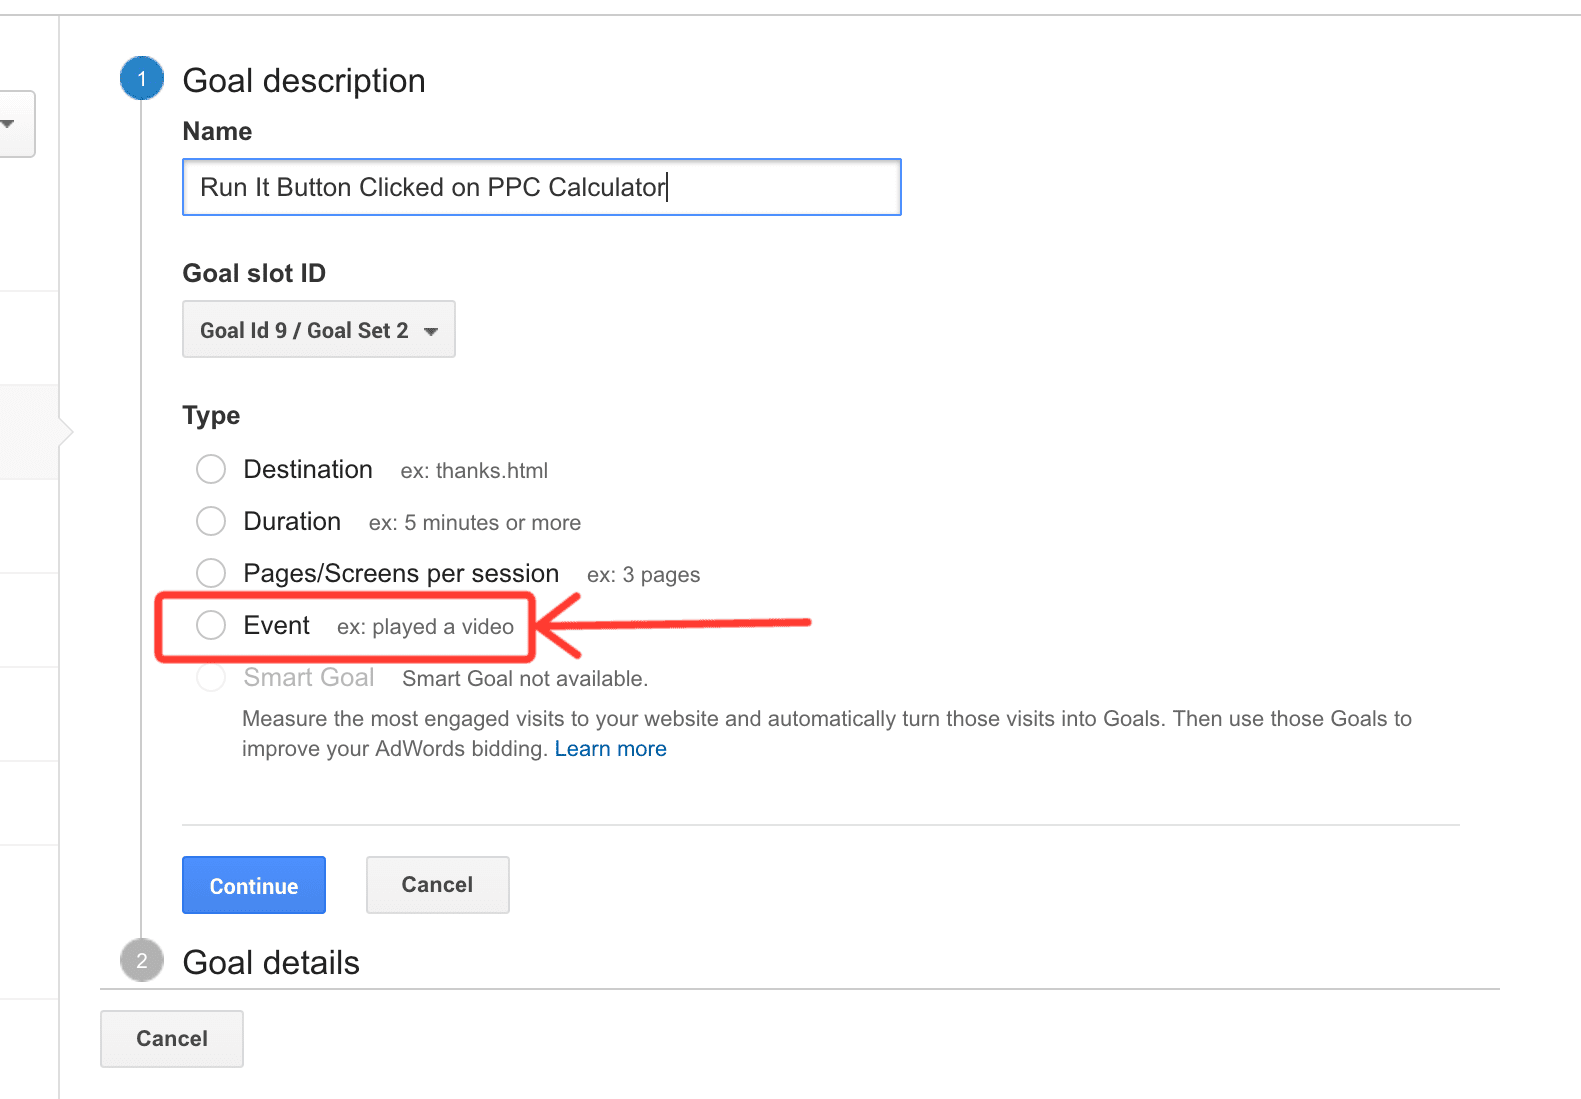
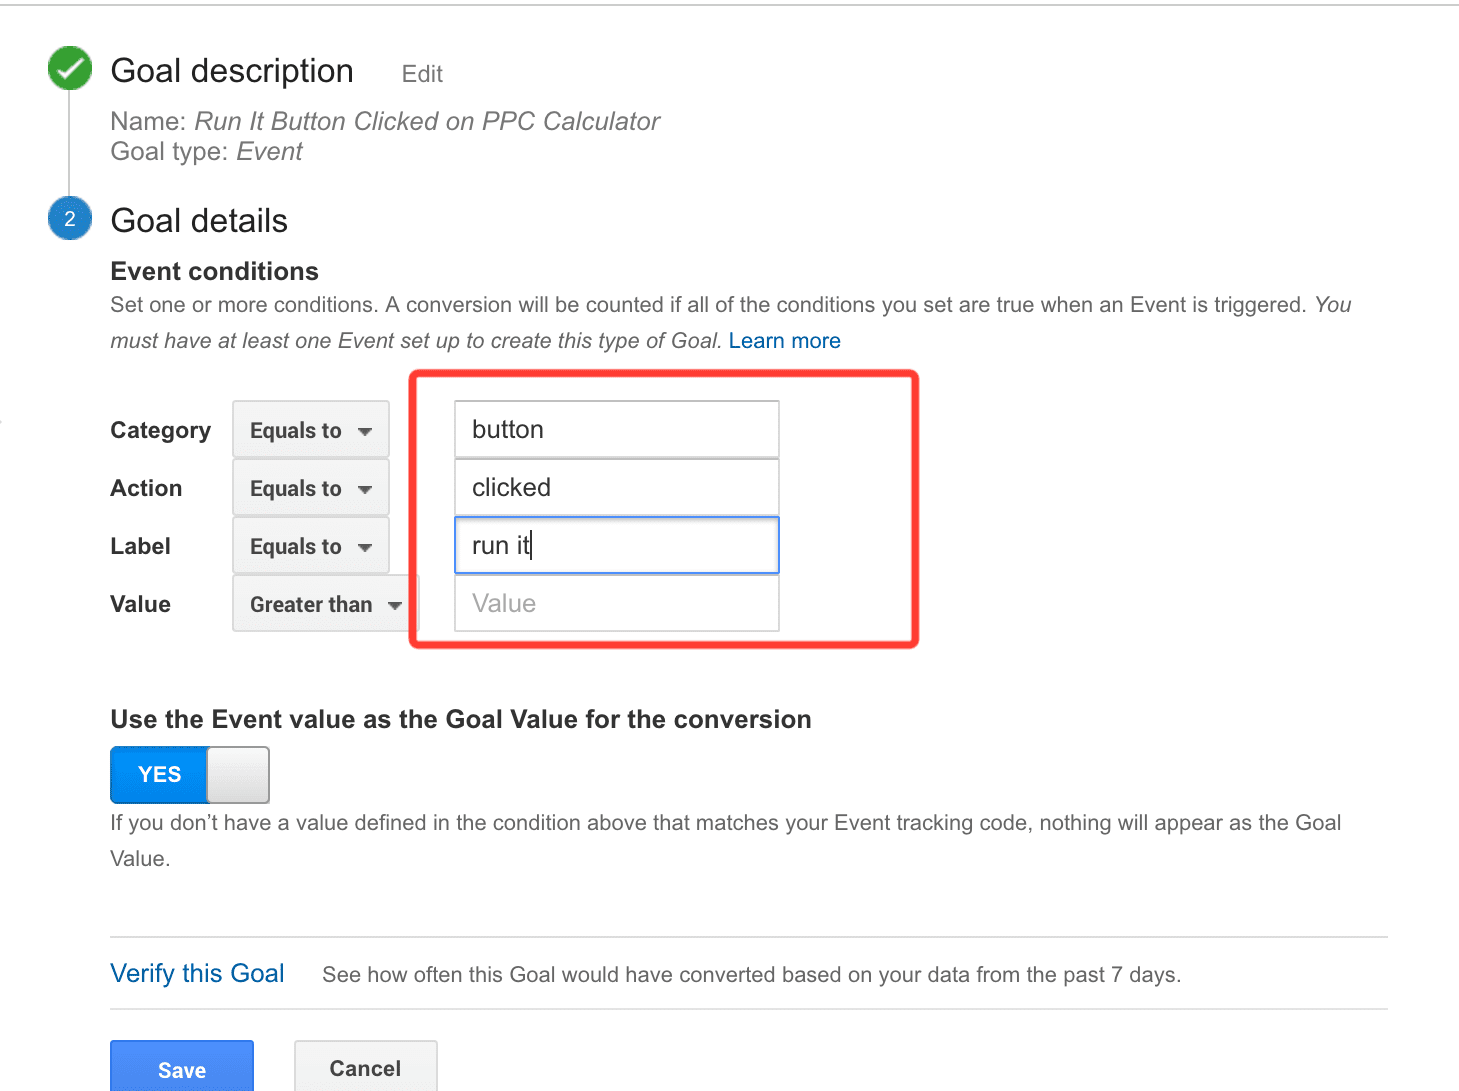
Step 5: Setup the event being tracked as a new goal in Analytics. We’re almost done! Now that I have the event firing properly, I want to create a goal out of this event simply to make my reporting life easier. Event tracking has it’s own section in the Behavior section of GA, but I’d rather look at the Goal data that is cross-referenced in just about every report. By adding this goal, I can then go to my Campaigns; isolate the LinkedIn ad campaign, and then select the conversion. I’ll show you this in two steps so you can see, but first name your goal and select “Event” as the goal type:
Next, you will need to identify the same parameters that we used in the code:
Save the goal and you’re done! The whole process may take you anywhere from 15 minutes to 1 hour, depending on your experience with code, GA, etc.